Saturday 30 March 2013

Day 5

I hate being late.  I slept through my alarm, and didn't get to Ned's until 10:30am.  9am is the usual time.  I stopped by an ATM on the way to pick up some cash- I'm now $150 away from being halfway done with my payments.  Whoo-hoo!  Let's get down to business.

The preliminary placement of the seven fan
braces
Friday was spent working on the braces of my guitar's soundboard.  For any new readers, the soundboard is the top of the guitar, and is the most crucial component of the guitar's sound production.  The most common soft/tone woods used for classical guitars are spruce and cedar, and cypress, in Spanish flamenco-style guitars.  I chose red cedar, for mine.  The soundboard has many braces, all strategically placed for structural purposes.  There are many different designs of bracing.  Steel-stringed guitars and classical guitars also possess different brace designs, as the strings on a steel-stringed guitar are more tense than the nylon strings of a classical/Spanish guitar, so the braces are placed, accordingly, to accommodate for structural
integrity.

I was able to get nine different braces done- seven of these nine were components of the fan bracing, and the other two were diagonal braces, located at the bottom of the soundboard.  I started by placing the seven fan braces in their respective positions, and double-checked my work from the last session, where I planed and sanded the bottom of the braces, making sure that they were perfectly perpendicular, when placed on the underside of the soundboard.  I did a couple little alterations, sanding certain parts on the bottom of the braces, and also a bit of planing/sanding on the tops of the braces, too, to make sure the tops were completely flat.  It is important to have both the top and bottom of each brace completely flat, so that the glue joint is flush, and so that when clamping the top of the braces after applying the glue, the clamp's pressure is distributed evenly across a the flat surface of the top, and not more or less on one side.

Four of the seven fan braces, glued and clamped to their
final resting places
After all of the alterations were done, I placed the first two braces that I would be gluing down, and clamped them into place, before applying the glue.  I examined both sides where they met the soundboard, to triple-check for a flush seating.  All systems were go.  I removed the clamps and the supplemental clamping system, and applied glue to the first brace, with an even bead across the length of it.  I then rubbed the bead in with my finger, distributing the glue evenly, and getting rid of any excess.  I placed the brace where it was to be glued, and pressed it firmly into place, to avoid any skating.  I repeated this process for the second brace, set the clamping supplements, and tightened two clamps into place. 
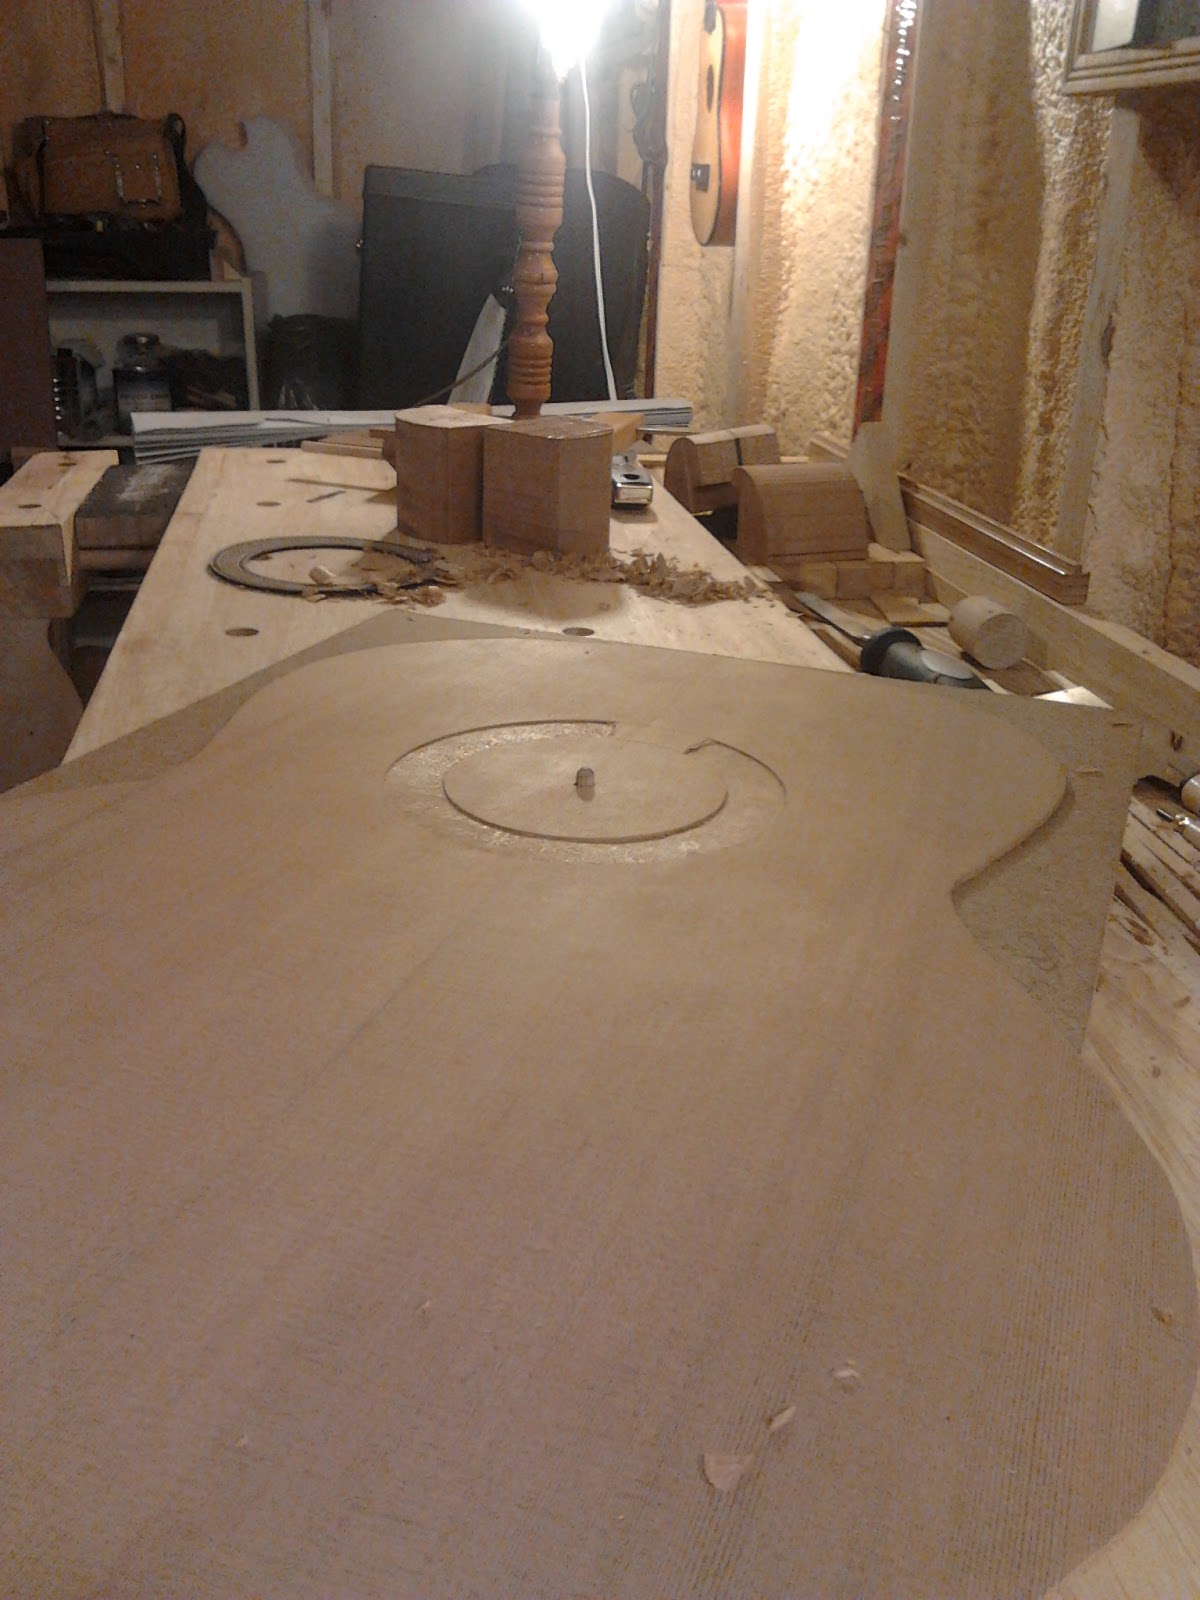
Here, you can see the template- it is the
octagonal-shaped surface beneath the
soundboard.


It is worth discussing the surface on which the soundboard lies, during the clamping process.  The top and back of a proper acoustic guitar are not completely flat- the center of each surface is a few millimeters higher than the outer edges.  To achieve this dome effect, there is a template-like device that the top and back are placed upon, when clamping the braces.  I've mentioned this, before, but will explain again:  the slight convex nature of the template upon which they are placed ensures that the braces are pressured into conforming to the curvature of the template, giving the top and back the same shape as said template.  The reason for having this convex shape lies within the laws of physics that dictate the science of sound propagation.

Meanwhile, back at the ranch, I rotated the soundboard, and the surface upon which it was clamped, and repeated the aforementioned process of placing, gluing, and clamping.  Four of the seven fan braces were now clamped and glued.  Ned recommended waiting about 35-45 minutes for the glue to set, before removing the clamps.  So I did.


After waiting for the glue to sufficiently set, I removed the clamps, scraped off the excess glue, and started this process over, to clamp the next pair of braces.  After the fifth and sixth braces were clamped, I did the prep-work on the seventh and final counterpart of the fan braces, then clamped it into place.  We took a lunch break, while the glue set. 

Earlier that morning, a gentleman named Dennis stopped by Ned's shop, accompanied by an acoustic Gibson guitar which he had picked up at a pawn shop, for a couple hundred dollars.  Ned examined it, and told him what needed to be done to it, which ended up only being a standard setup (intonation, adjusting the action, re-stringing, et cetera).  Ned is very honest when it comes to assessing guitars- he won't try to coax you into doing some sort of repair or alteration if it's not truly necessary.  Dennis was fine with his conclusion- he left his guitar, and then left, himself.


After lunch, I returned to my workspace to finish what I had started.  I unclamped the last of the fan braces, scraped the excess glue off, and began the next step, which included planing, measuring, and sanding the braces.  I began by measuring the height of the first brace.  It was something like 8-9mm.  The height of each of the fan braces was to differ, based on their location.  Some guitar makers will make the braces a standard 6mm across all of the fan braces, while others will reduce them to lengths ranging from 5.5-6.5mm.  In theory, you want some of the braces to be higher than others, depending on which side of the soundboard they're on- this is done to accommodate the sounds they will be aiding in the perpetuation of, relative to whether they're on the treble or bass side of the strings.  Braces closer to the treble side of the guitar will possess a shorter height, while those on the bass side will have a higher one.  This, again, is dictated by physics, and the fact that lower wave frequencies need more medium to travel through, to complete more wave cycles, while higher frequencies don't need as much.

Long story short, I planed and checked the height of all of the braces, reducing them to the height at which they needed to be.  Once I finished this step, I began planing their sides, as I had done with the back's braces, thus giving them a vault effect.  I continued to do this to all seven braces, and then sanded them smooth. 

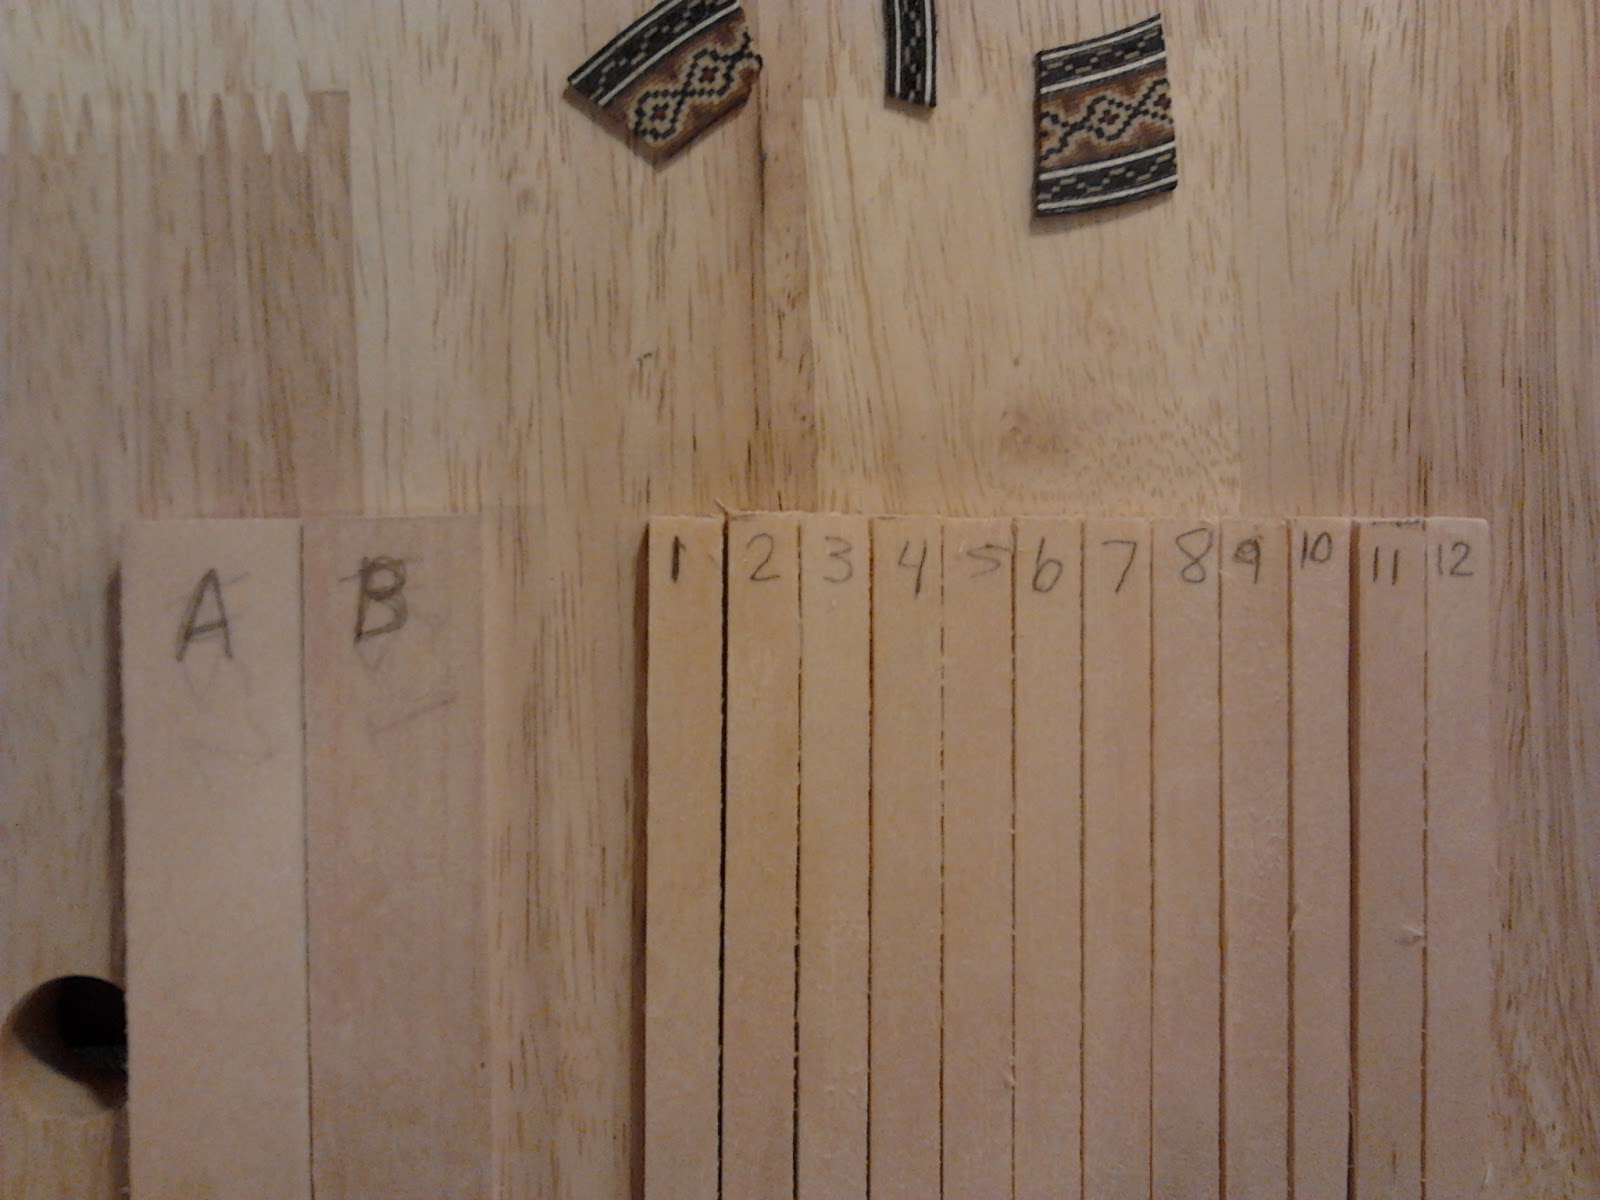
The workday was drawing to an end.  I glued and clamped two more braces into place, which were located underneath the fan braces, at the bottom of the soundboard.  While they dried, I went to check out what Ned was doing.  I had observed him earlier that day- he was applying the purfling to the perimeter of his guitar.  This was a tedious process, as it involved three tiny strips of wood, glue, and a ridiculous amount of painter's tape.  I won't get into too many details- you'll see what I'm talking about once I come to this step, later down the road.  It's cool to see some of the work that Ned is doing, as it gives me a preview of what I'll be doing in the future.

Once my last 2 braces were set, I unclamped them and scraped off the excess of glue, and then cleaned up my space.  I had glued nine braces, total, and gotten seven of these nine shaped.  I didn't get to the scalloping, but I did start making the marks where the scalloping would start.  I believe it was about 2.5cm from the edge of each fan brace.  I finished up the lager that Ned had served me, earlier, and put all of my materials away.  I removed my slippers, and headed upstairs.  The day was done.


Tuesday 19 March 2013

Day 4.5

The rosette, set in the soundboard- all of the original glue
that was leftover from the clamping process is still evident.
I was scheduled to work until 5pm, but had a feeling I'd get off early- and I did.  I headed to Ned's around 3, and spent an hour and a half working on my rosette.  I got to do the unveiling of the glue job- I peeled back the wax paper slowly; carefully.  While I was doing this, Ned reminded me that I was going to be scraping all of the glue and debris off, which, basically, was code for "give 'er!"  So I did- I ripped it all off, and took a look.  I felt the height differential of the rosette against the surface of the soundboard, and was surprised at how well it had set in.  We looked at the edges of the rosette, and saw that it had expanded in the channel quite well- there were no gaps, whatsoever.  The fit was immaculate!
Ned proceeded to explain to me what exactly I needed to do, and how to do it.  That I could not scrape any wood from the surface of the soundboard was emphasized upon, due to the fact that it was already at its final thickness.  He started the scraping, to demonstrate, and I watched closely.  I took the scraper from him, and began to imitate what he had shown me.  I needed to scrape what was probably 1-2mm off of the surface of the rosette, to make it flush with the top of the soundboard.  As usual, I had to bend the scraper slightly, and hold it at the proper angle.  This time, I had to be even more vigilant in seeing where the contact was being made.  I needed to keep the contact point on the rosette completely, which was less than an inch wide.  It was a very particular process.  This went on for some time.  I noticed the shavings and wood dust that came off of the rosette, and how they were multi-coloured, and not the usual colour of natural wood, which I had become so used to seeing.  The texture was also different, since the rosette is made up of tiny granules of wood, and glue.

I was nervous, at times- I didn't want the scraper to touch the cedar.  As I made my way to the edges, Ned pointed out that I needed to be careful, due to the fact that the scraper could potentially pull out little bits of the rosette, on the edge that was to be covered by the fingerboard.  He got a little sliver of wood, and went to measure the width of the neck of one his guitars, marking the sides and center.  We placed the wood on my guitar-to-be, and made pencil marks above the rosette, indicating where the fingerboard would intersect and cover it- this was my margin to stay within.  I had to make sure that if/when the granules of wood were torn out, that they didn't pass the outside of these lines.

After an hour and some change of scraping, I got Ned to take a look.  He showed me a technique to reveal any residual glue, so it could be seen and scraped off.  He sprayed a cottonball with the slightest amount of water, and dabbed potential spots where glue remained.  This helped soften the glue, and also transformed it from transparent to translucent.  I continued scraping, and kept working on my technique, until I was 95% of the way there.  I got Ned to take another look, and told him I was nervous about a couple spots- he aided me in the scraping, for a moment, doing the fine points which I didn't want to risk erring on.  After that, I resumed ownership of the scraper, and did the finishing touches.  I stepped back and took a look, and ran my fingers over it, feeling the smooth transition of cedar to rosette, and felt the slight bumps of the rosette's grain.  It was done.  The scraping made the colours of the rosette even more vibrant- it was quite a sight.  Precise; truly beautiful.


A close-up view of the detail of the rosette-
you can also see just how well it is seated in the soundboard.

And that concluded the evening.  I finished the tea Ned had served me, and headed to my next destination- dinner!  A friend invited me to her place for some food- I went and hung out for a few hours, meeting a few new people, in the process. Now, I'm home, laying in bed, all cozy-like, enjoying a small glass of 12 year-old single-malt Scotch, and some music, by candlelight.  Sleep is in my not-so-distant future...

Monday 18 March 2013

Day 4

Monday, Monday, Monday!  Monday was a productive day.  As I mentioned in my last post, I didn't have enough battery left on my phone to take a picture of the completed back, and would include one on my next post.  Here're two!


As you can see, there is still some final cutting to do, which will be done once the back and soundboard are ready to be joined.  But for now, the back is completed.  Before the body is assembled, the soundboard must have its braces glued on, shaped, and scalloped, the rosette must be applied, the soundhole must be cut out, and the sides must be dressed and planed/scraped-to-thickness.  A few of these steps were started, today!

The first thing I did in the shop today was some scraping.  I pulled out the good ol' wood scrapers, and started dressing my soundboard.  The exterior surface was already finished, but the interior needed lots of work.  I scraped away at that for a good hour or so, until the thickness was suitable.  The core of the soundboard is slightly thicker than the edges, due to the speaker effect that I mentioned before.  The sides are thinner, to allow optimal sound delivery, just as a loudspeaker has its electromagnetic core, and fibrous cone, surrounding it.  The objective thickness was about 2.5mm for the core, and about 2.0-2.2mm for the exterior edges.  The top of the soundboard is allowed to be a bit thicker, as it is mostly there for structure, while the lower and wider portion of the guitar is the primary sound-producer.  I scraped some spots a bit more than was necessary, and thought that it was too thin, at one point- but upon assessing the situation, Ned and I determined that everything was fine, as some of the thin spots were on the very edge, which will be trimmed off, later on down the road.  All's well that ends well!

Pictured above, is the incising compass (made by Ned)
used to score the circular outlines of the rosette channel.

Once the soundboard was properly dressed/scraped-to-thickness, I put the soundboard template on top of it.  The template has a series of holes in it, marking the ends of each brace location, and the soundhole's center.  I used a pencil to mark each of these locations.  I proceeded to drill a hole, where the center of the soundhole was marked- this hole was sized to fit around a peg, seated in a board we used for the rosette application process.  The next step was the marking of the rosette channel- this is done by scoring two concentric circles on the soundboard's surface:  One is the outline of the soundhole, and the other is the exterior edge of the rosette channel.  I did a couple test runs on a piece of wood Ned had kicking around, which went well (Ned complimented my circle cutting ability, and said that it was a very nice circle.  It was, indeed!).  For this process, I used a little rig that Ned had made, which was comprised of a small wooden dowel, two small blocks of wood, a couple wooden pegs, and a small blade.  He's a handy guy!  This device is essentially a specialized compass, used specifically for this task.  One of the wooden blocks has a divot on the bottom- the peg that the drilled hole fits around also goes into this divot, as a centre point for the incising compass.  I carefully cut the outline of the soundhole, handed the rig to Ned, for calibrating, then cut the second/outer circle.  It was done! 


A rosette


The next step was to chisel out the space between the two concentric circles- this was to be the channel that the rosette would fill in.  I've used the term "rosette" a few times now- to anyone reading who doesn't quite know what a rosette is, I'll tell you, now:  the rosette is a decorative ring that is found around the soundhole of a guitar.  It is a circular mosaic, made with many tiny pieces of coloured wood, each being approximately the size of a grain of sand.  In today's industry, many mass-produced acoustic guitars have rosettes that are mere decals, but in most quality guitars, the rosette will be an actual mosaic.  One can only appreciate the work that goes into this decorative ring by looking very closely at it, to see how detailed it truly is.


The chiseling of the rosette channel

Ok, back to the process!  Next, I began chiseling between the two circles I had cut.  This is a tedious process, as you have to be very careful not to touch the soundboard, beyond the score marks.  Most people might stress over this, and get anxious, but with my personality-type, I found it to be relaxing, and meditative, even.  I enjoy "obsessing," for lack of better terms, over tiny details like this.  The channel was only to be about a millimeter deep, as the rosette is not very thick, and the soundboard is just over two millimeters, as it is.  I continued to cautiously chisel away at the wood.  Ned had started the process for me, to illustrate a good technique to prevent the chisel from shooting forward, whilst applying pressure in the process.  Once I had it down pat, I spent a good half hour or so making everything as it should have been.  The very top of the circle didn't need to be chiseled out, as it would be underneath of the fingerboard, and furthermore, it would probably maintain more structural integrity by being left as it was.  I let Ned check my work a couple times, and after tweaking it a bit, I was done with the chisel.  At this point, we placed the rosette in the channel, to make sure it fit properly- and it did. 


Now, in all of reality, it is hard to have a product like a tiny wood mosaic rosette that is completely and perfectly circular.  The lines I cut for its channel, were, however, perfect circles- this meant that once we glued it in, we'd have to manipulate it a bit for it to properly conform to the perfectly circular channel in which it would be seated.  While the margin of error was only a millimeter or so away from it being a perfect circle, it was still a fragile process.  One must be gentle when handling the rosette, as to not damage it in any way.  Ned also informed me that once the rosette came into contact with the glue, we'd only have roughly 7 seconds to fit it in properly, before it would start to swell a bit, and become harder to manage... the pressure was on.


The clamping setup of the rosette application
I prepared for this process by putting aside 4 clamps, and a sheet of wax paper, while Ned found a square piece of wood which we'd use to clamp onto.  We used two types of glue- well, they were the same type of glue, but one of the bottles had been diluted, making it thinner.  The less viscous of the two was applied first, with a generous strip around each edge of the channel, followed by a single circle of the thicker glue, in the middle of the channel.  We then blended the glue, to ensure that every last bit of the channel was saturated with a generous amount of it.  Now it was time to set the rosette.  The bottom went in first, and we then shimmied each side of it into place.  It started to resist a bit, so I let Ned take over, for this, as he has much more experience than I.  I assisted where I could, and finally, in a matter of seconds, it had been wrestled into place.  I quickly grabbed the sheet of wax paper to put over it, and the piece of wood, to seal its fate.  Applying pressure the whole time, we grabbed the clamps, and put them tightly into place.  Phew!  All of this took less than a minute, but it was pretty intense.
The whole clamping setup was put aside to dry, and I began a new task.  Since my back was completed, and my soundboard was currently untouchable, Ned directed me to start working on the braces that were to be used for my soundboard.  I laid them all out, and Ned directed me as to what was to be done.  I measured each of the brace planks to fit a corresponding brace marking on the soundboard template, marked it, then cut it with a Japanese-style paddle saw, which cuts on the pull stroke.  After cutting each brace to length, I sanded one side of it until it was smooth and flat, then tested it against a square, to ensure that the sides would be perpendicular to surface of the soundboard.  There were fourteen braces to do.  Twelve of them were the same height and width, while two of them were a bit bulkier- these two were to be the harmonic bars.  I numbered each brace to correspond with numbers on the template, so I knew which length fit where.  This process was my last one of the day.

The soundboard's braces, numbered 1-12, and the harmonic bars, labeled "A" and "B."


I proceeded to cleanup my workspace, and then checked the clock.  It was fifteen minutes until quitting time.  I considered starting on the planing/scraping of the guitar's sides, which were still untouched, but decided against it, as I only had fifteen minutes left, and had already cleaned up- planing and scraping would just make another big mess.  At the end of the day, I had finished dressing my soundboard, chiseled the channel for, and applied the rosette, and prepared all of my soundboard's braces.
  Before leaving, Ned asked me if I could come in the following day, after work, to do some work on the rosette- his reasoning was that it would be much easier to scrape away the excess glue before it had completely hardened.  I had scraped away the glue from my back's braces the same day we had glued it, and it made it much easier.  So tomorrow evening, I'll be going in to do some finishing work on my rosette- look forward to a supplementary entry, tomorrow evening!  Thanks for reading!

Saturday 16 March 2013

Day 3

Friday morning.  After having a beautiful Spring-like Thursday, Friday's constant light falling of snow made it known that we weren't quite out of the wintry woods, yet.  There was little-to-no accumulation, so I was pleased with that.  I'm ready for spring!  

Upon arriving to Ned's house, I met his parents, who had stayed the night, for a visit, after their return from Cuba.  I had heard Ned speak of his parents before, so it was kind of neat to meet them.


The slippers I wear, whilst working in the shop.  Comfy!
This are also my favourite pair of socks- I have two of them.

We headed into the shop, and got to work.  I began by doing a bit of scraping on the exterior surface of my soundboard, to get it to the almost-complete stage.  This included looking at it from different angles, next to a light, to identify any potential discrepancies on the texture of its surface.  There were a couple little spots that stood out, but they were eventually rectified via scraping and sanding.  The reverse/interior side of the soundboard hadn't been touched, yet, so it was still very rough looking- the glue squeeze-out from the seam was still visible, as were the saw marks from the initial cutting of it.

I put my soundboard aside, as Ned directed me to start working on the braces for the back of the guitar.  We put the back of the guitar on the brace placing cradle, and placed the braces on top of the back, arc-side down.  The cradle helps you to properly assess where the braces will be, to make the back as structurally sound as possible.  There are 4 braces for the back, that run in a manner that is perpendicular to the neck of the guitar.  I placed the braces, and used a pencil to mark exactly where their edges stopped, on the centre strip. 


Ned briefly discussed different theories on brace placement, and mentioned how the guy who mentored him on his first guitar liked to place the braces so that they weren't exactly parallel to each other- his reasoning behind this was that if the braces are perfectly parallel, sound waves have more of a chance to bounce back and forth, indefinitely, between two braces, which could very slightly, theoretically, alter the sound, via constructive or destructive wave interference.  Conversely, the fact that we shape the braces to have a peaked profile, not dissimilar to that of a church window or door, still enables the waves to bounce back and forth off of the braces- but the gradual grade to the brace's peak forces the waves up and out, and back into the greater hollow of the body.  Each time we spoke of sound propagation and the physics of sound, the more grateful I was for taking two physics courses in my high school years.  I enjoy the sciences, very much so.  They are the laws of existence!
The first brace channel, paired with an assortment of braces and chisels


Upon marking the four brace points on my centre strip, I then used a large chisel to very carefully score the Mahogany centre strip within the lines of the brace marking, and then used a much smaller chisel to scrape out the entirety of the wood between the two lines.  These channels allow the brace to intersect the centre strip, and be flush against the back of the guitar.  I did this process four times, until I had four slots that were roughly 7.3mm wide.


All of the braces, placed in their respective channels- again, with my selection of chisels
Clamping setup- angle 1


Now, it was time to glue.  Before doing this, we set up a clamping system using different wood shims, arranging them so we could use four clamps to effectively clamp all 4 braces, from both sides of the centre.  Upon finishing this bit of preparatory work, we set our clamping systems aside, and I proceeded to apply glue to the braces, one at a time.  The glue is applied to arced side of each brace, as the clamping process conforms the back of the guitar to the very slight curve of the braces, and of the brace cradle's, whose curves the braces' are modeled after.  Upon gluing and placing each of the four braces, 

we set our clamping systems back in place,
and tightened the clamps, in their respective positions.
Clamping setup - angle 2
Clamping setup- angle 3

                                                                                                                                                                        
While the glue dried, I did a bit more work on the soundboard, touching it up to get its exterior as close to final as I could.  A this point, I indulged in a pot of black Passionfruit black tea, which I continued to sip on throughout the morning and afternoon- tea is a most splendid beverage.


Ned had been periodically calling me over to his workbench throughout the day, showing me the progress he was making with a repair that he was working on.  He had been re-fretting a Spanish Flamenco guitar that a gentleman had brought in, which was made in Seville.  This process involved tearing out all of the old frets, and putting in new ones.  It's a long and tedious process, as when you rip out the old frets, a lot of chipping on your fingerboard will naturally occur, due to the resistance caused by the bevels on the fret tang.  The fingerboard of this guitar was Ebony, which is a very hard and dense wood- ebony is especially prone to chipping, due to its dense nature.  It's so dense, that when placed in water, instead of floating, as most woods do, it sinks! Throughout the day, I observed the steps and techniques taken to fret this guitar, and the preventative measures he took to protect the finish of the guitar, in the process.  I knew I would have to fret my guitar, when it was time, so seeing some of the steps involved was good insight.  There is lots of filing involved, and it is crucial that all of the frets are the same height.  Some frets are going to naturally be a tiny bit higher than others, just due to minor discrepancies in the slot which they are seated- filing is done to bring their heights to the one point.  After they are all level, you must crown them- this process is to properly round the frets, once they have been leveled, and involves filing from all sides, to make sure they are properly shaped.  The top of each fret will have a slight plateau, for optimum string-to-fret contact.  I'll get into more details of this process, once I get there on my own guitar!

We took a lunch break, and then returned to the shop, at which point the glue on my braces had dried.  I removed the clamps, and the structures that aided the process.  The first step was to use the smallest of the wood scrapers to remove the glue squeeze-out from each side of the brace, where it was now glued to the back.  This was a process that involved becoming acquainted with the sound and feel of the contact made by the scraper with the wood- it was necessary to get the scraper's corner as tight against the right angle of the brace and back as possible, to make a flush contact, to scrape the entirety of the glue residue from the wood.  It took some time to get the method and technique down, but after a few tries, accompanied by tips and demonstration from Ned, I got the hang of it, and proceeded to remove all of the excess glue.  Once that was done, it was time to start shaping the braces.

Each of the four braces, and all of the braces within the guitar, for that matter, would be shaped to have a peak, as I mentioned before, similar to the shape of church doors or stained glass windows.


Here, you can see a brace, the protective tape put down on
either side, to protect the Indian Rosewood, the small plane
being used to shape the braces, and a thin ribbon of Spruce,
taken off by the plane.
To achieve the desired shape, I used a very small plane to scrape wood from each of the top corners of the braces.  At the beginning, the braces are thin rectangular planks of Spruce, about 7-7.3mm wide, and roughly 16-17mm tall.  The planing begins on the top corners, and as you create a flat surface in the blade's wake, you must cater to each of the created edges, from each new plane on the wood that you make.  When properly done, all new ridges and corners will become blended into one, thus giving you a steadily curved profile.  This process is done to both sides, until the rough shape is achieved.  Upon completion of the initial shaping, 2-3 different grades of sandpaper are used to finish the brace, and finally, an abrasive pad to give it a nice, smooth, finish, with an almost reflective sheen.  It is important to make the braces as smooth,
consistent, and aesthetically appealing as
possible, as a couple of the back braces will
be visible through the soundhole. 
Prestige is key!

The final shape of the braces, pre-scalloping (angle 1).

Angle 2

It is also worth mentioning that, as I mentioned in previous blog entries, the braces are purely for structural integrity, and different factors are taken into consideration during the shaping, planing, and cutting processes of them.  The three types of grain orientation are half of it, and the shaping and placement of the braces is the other half.  The closer to straight each of your grain orientations are, and at right angles, relative to each other, the more structurally sound your braces will be.  It is hard to properly illustrate this concept without an array of pictures, which I do not currently have, but perhaps I will provide a supplementary entry on this phenomenon.

Towards the end of the day, being Friday, Ned and I split a pint of Estrella Damm, which is a Catalan pilsener, brewed in Barcelona since 1876, by S.A. Damm.  This is a crisp and refreshing pale lager, brewed at 5.25% ABV.  "Estrella" means "star," in Spanish and Catalan, alike.  Ned deemed it appropriate to drink a Spanish beer, since he was working on a Spanish guitar- I wholeheartedly concurred.

Now that my braces were properly shaped, it was time to do the scalloping on the edges of each one.  Scalloping is tapering the edges of the braces, once they near the edge of the guitar.  I placed a template on top of the braces, that was the exact shape of the back of the guitar.  Since I still had a circumferential margin of wood on the back of the guitar, the template allowed me to mark where the cuts would be made on the back of the guitar, when it came time to cut it to its final shape.  I marked on each side of the four braces where the edge of the guitar would be, and proceeded to measure 3.5cm in from each one of these, and make an additional line, at this point.  Once I did this to all of the braces, I began scalloping.  To do this, I placed the tip of the large chisel, beveled side down, on the outer edge of the pencil mark, and began removing strips of wood from the braces.  This is also a process which involves feeling what you are doing, in order to get the smoothest and most fluid stroke down pat.  I continued to do this to each of the outer edges of the braces, until the thinnest portion measured about 3mm.  The scallop, viewed from the side, is essentially an exponential, or even logarithmic curve, that is aesthetically pleasing, and very natural looking.  It all boils down to the math and physics, in which the theory of sound propagation is rooted.


Somewhere around this point, Ned and I split another brew, which I provided.  This one was Dieu du Ciel's Solstice d'Hiver (French for Winter Solstice), a 9.8% ABV barley wine, brewed in Montreal, QC.  Exceptionally smooth for such a strong beer, this beverage was a good supplement to our day's end.

It was very rewarding to see the completed scalloping of the back braces- the shapes therein were very nice to look at, and possessed an inherent beauty and sense of majesty.  The shape is created as such, for a reason- Ned explained this all to me.  The back of the guitar functions in a manner not dissimilar to that of a common loudspeaker- the center is the core, and thus, the sturdiest, as is the case with a speaker.  The speaker has its rigid electromagnetic core, and its thin fibrous membrane, flowering from the centre.  This thin membrane vibrates, and breathes, as a diaphragm does, enabling the transfer and propagation of sound waves- this is what the back of a guitar does.  The scalloping enables the edge of the guitar to flex a bit more, theoretically, than the core, allowing it to exhale, or expel the sound, through the soundhole.  The braces are also fitted into chiseled channels in the lining of the sides of the guitar, which are seated at the seams created by joining the guitar's back and soundboard.  In my guitar, this lining will be a solid strip of wood, which lines the interior.  Having the braces each seated within this strip, it enables any unforeseen force placed upon the guitar to propagate, and spread throughout the guitar, thus weakening the potential damage of this force, instead of this force being confined to the portion of the guitar which it initially comes into contact with.  Think of it as a defense system, of sorts.  Instead of one part of the body being detrimentally affected, the mass of the body will distribute the blow, thus reducing potential damage.  You get the picture!


The back of my guitar is now finished.  Unfortunately, I wasn't able to take a final picture, as my phone was too low on battery to permit me to use its camera function.  Next week, I will have a picture to share- I will be going back to the shop to continue working on the soundboard, on Monday.  The next step of the process will be to finish dressing the interior surface of my Red Cedar soundboard, mark the brace locations, glue the braces down, then shape, sand, and scallop them.  While the back of the guitar has only four long braces, the soundboard, I believe, has 15 braces, all varying in length.  Ned and I aim to have this process completed within two days' time.  I can't wait!

Until next time...

Friday 8 March 2013

Day 2


Upon arriving at the workshop, I was greeted by my soundboard, which had been successfully joined.  I was astonished at the strength of a simple glue joint.  I held the wood in the proper place, tapping it, and listening to its tone- it sounded good.  This is a test done throughout the process, to check the tonal quality and integrity of the wood- it produces different harmonic notes, depending where you hold and tap it. 

That day, I dressed one side of the now-joined soundboard, and did the same to the second side of the back of the guitar.  

                                              A wood scraper, atop the Red Cedar soundboard


                                                Red Cedar soundboard, joined and dressed


 Before doing too much scraping and planing, I joined the two panels of Indian Rosewood that were the back of the guitar, in the same manner as I did with the Red Cedar soundboard.  I then traced two outlines of the shape of the guitar’s soundboard, one being the actual shape, and the other, a parallel outline about a centimeter outside of the first one, which acts as a safety margin.  The cutting was done on a band saw.   

                                          Red Cedar soundboard, roughly cut-to-shape


Once this was done, we took a lunch break.  Upon returning to the workshop, the back of the guitar had been successfully joined- the glue was now dry.  It was time to continue planning and scraping.  I used calipers throughout the planning and scraping of the back of the guitar, until the desired thickness was achieved- for this stage, the goal was 2.3mm.  


                                            The guitar's Indian Rosewood back, joined


                                              Alternate view


Scraping is a touchy process- you use a small piece of rectangular metal, about 3 inches by four.  Each edge has a “bur,” which is produced by burnishing the edge of the metal.  A burnisher is a small tool with a wooden handle, and a small cylindrical piece of metal, at the tip.  You press hard, at a 90 degree angle, against the edge of the scraper, and slide it across the length of the edge.  This gives it a sharp edge, on each side.  You must do it carefully, making sure you don’t have too much or too little of an edge.  Once your tool is properly sharpened, you apply pressure in the middle of the metal, giving it a slight bow, and you experiment with different angles and directions of scraping the wood, to find out which is most effective.  You must scrape in the proper direction, so as to prevent grain runout.  Grain runout is a phenomenon that occurs when you plane or scrape against the grain, causing it to splinter, which is undesirable for obvious reasons.  Scraping takes a lot of effort, as you must use press hard, and scrape repetitively.  It takes off fractions of a millimeter, each time.  You must also scrape the wood evenly, so you don’t have some parts that are thicker than others- it must remain a uniform thickness.  The metal also gets quite hot from the friction, and it is recommended that you wear gloves.  It does a number on the joints of your thumbs!  Before completing the scraping, I traced the outline of the back of the guitar, in the same manner as I did for the soundboard, and cut it to shape, on the band saw.  This was done at that point, to avoid excessive scraping on portions of the wood that were to be trimmed off.  I spent a good portion of time getting it to 2.3mm, and then was done.  

                                  The guitar's Indian Rosewood back, roughly cut-to-shape


                                    Depicted here, is me, doing some additional planing


                         Further scraping revealed beautiful hues of orange and pinkish-purple, 
                           on the sides of the back.  I was initially going to use the opposite side 
                           for the exterior, but upon seeing these beautiful colors, I changed my 
                                                 mind, and decided to let this side shine.


At this point, I applied the centre strip to the back of the guitar, right down the seam of the glue joint.  This is a structural reinforcement, made of Mahogany.  It is a small rectangular piece of wood, roughly a centimeter wide, and 4mm thick, that runs up and down the length of the back.    After measuring and placing it, it was glued and evenly clamped, with three clamps.   

                                 The clamping setup for the application of the centre strip


While it dried, I picked out the four back braces, and traced a slight arc on them, in preparation for their shaping.  I used a plane to trim off each side of the top, giving it an arc, and gently sanding it, to finish it off.  A template was used to gauge the braces, fitting each one to an existing arc.  If there were any gaps, more sanding or planing had to be done, to ensure that each brace had the proper arc.  By the time this step was completed, the centre strip had dried.  I then unclamped it, and brought it to the workbench, where I began to use a very small wooden plane, to shave off each of the top edges, which would eventually give it an arc.  It was planed and sanded down until the edges were practically flush with the back of the guitar, and the top was properly curved.  I used different grades of sandpaper, going from coarse to fine, to finish it off.  By the time it was done, the grain of the Mahogany was visible, and the surface was quite smooth.  This was the last step of the day.  


                                                            The completed centre strip

                                 A colour and grain contrast of the guitar's front and back

                        Back and front, respectively.  At the bottom right, you'll see the bracing
                       template used to gauge the arcs and place the braces for the guitar's back.