Tuesday 28 May 2013

Day 13

The thirteenth day.  One thing Ned and I discussed on this particular Tuesday was the length of the project.  Him knowing the rate of progress, and the steps involved, he made me aware that we were going to end up going over the estimated twenty days of work.  My guess is that the project will probably end up being between twenty and twenty-five days of work.  Que sera sera.

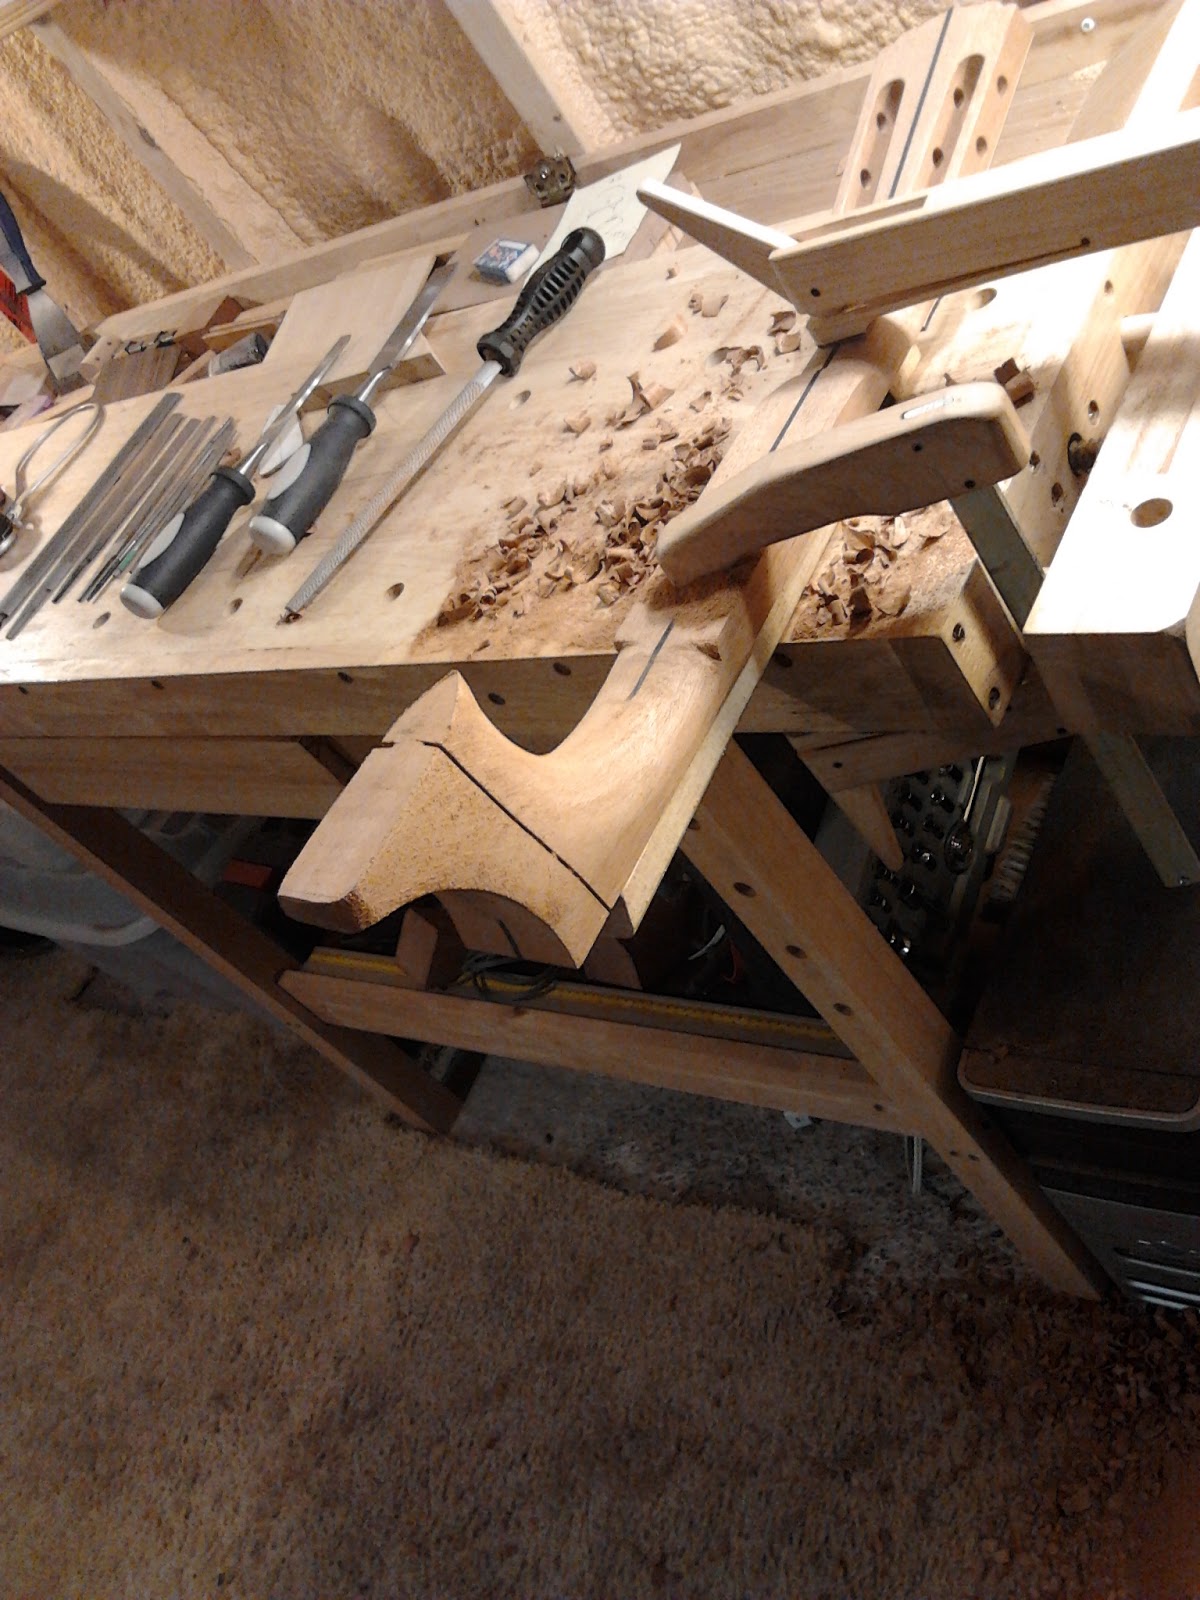
I started the day off with a bit of work on my bridge, I believe.  Sometimes when I recollect what I did in a day's work, I forget what order I did things in.  Anyway, to the bridge... I had to shape the tie block, and give it a bit of a slope, with the high end being the end that was to be nearest the bottom of the guitar, and the low end being that which is closest to the saddle. 
Here's the bridge- you can see the slope I gave
to the tie block, on the left.
I did this with a plane and file.  I clamped the bridge into the vice, and began with the small ebony plane.  After getting the bulk of the work done with the plane, I finished it off with a file.  The surface had to be completely flat, and smooth, as it would be a gluing surface- a strip of ebony and two small strips of bone would go here.  Once the bridge was done, I did some work on the small piece of ebony that Ned cut for me.  I had to reduce its width to fit the tie block's width, with an allowance for the two small bone strips.  If I remember correctly, the tie block was 11.5mm thick, and the collective width of the two bone strips was about 3.75mm.  This meant the ebony  strip had to be about 8.4mm.  The small strips of bone were to overlap the tie block very slightly, and they would be made flush with it, by means of a file.  so I used the same ebony plane to ready the ebony for gluing, which mean reducing its two sides, making them straight and flat for a gluing surface, where the bone was to be adhered.  Once all was said and done, I placed a sheet of wax paper on the bench, and we got some wedges ready to glue the bone and ebony together.  This part was tricky.  Ned did most of the configuring in the gluing process, as he has done it countless
The small strips of bone
times, and it was just a bit quicker, that way.  I applied the glue, and we let the bone and ebony set.  A few jokes were made, in the process, involving "ebony and ivory."  Haha.


The ebony and bone bits were left to dry, and more work was done, in the meantime.  I got my sides out, and took them upstairs.  They were to be soaked in the bathtub for a half an hour, or so, so I drew a bath for them, and placed them in the water.  Lunch happened, and then the sides were taken back downstairs, to the shop.  Before lunch, Ned had turned the heating peg on, which was used to bend the sides.  The sides were about 2mm thick, if I remember correctly, so they have a bit of natural flex to them.  Once heat is added, is makes them even more malleable.  I did a practice run of bending on a long, thin piece of ebony, to get the gist.  I then started bending the sides.  I was very cautious at first, as I didn't want to apply too much pressure, which could result in severe damages.  I got the hang of how much pressure to add, what motions to make, and how long it takes to heat the wood before the wood sort of "gives."  The bending took most of the afternoon, save for a portion that was spent on gluing the ebony and bone pieces onto the bridge's tie block.


This is the heating peg I used to bend the sides,
stained with residue from the Indian rosewood.

The bone and ebony were taken out of the wedges, where they were glued, and were reduced on the belt sander, to get excess glue off, mostly.  I then applied glue, and clamped them into place.  While I was doing this, Ned had a client in- I introduced myself, and Ned told him what I was doing, as I continued my work.  I used 3 small clamps, placed equidistantly across the length of the tie block.  I made the edge closest to the saddle flush, and left the slight overhang at the back of the tie block, as it is easier to access with a file, without having the saddle in the way.


Here's the bone and ebony, being glued
and clamped to the tie block.

Once the sides were finished, they were placed into a clamping jig, which was in the shape of the guitar.  This essentially kept the sides in the shape they were in, while being stored for the week or so that I was to spend away from them, before they get glued.  The sides may need a small finishing touch before the gluing process, but I'm not entirely sure. 

 
Here's one of the sides, bent to shape, and wedged to
a form that Ned made.  Both sides are now bent, but my
camera was too low on battery to take a picture.
Next time!


Tuesday 14 May 2013

Day 12

Day twelve consisted of much more work on the headstock/neck/heel block unit of the guitar.  If you saw entry 11, you'd know that I did plenty of filing work on the headstock.  I did some more work on the base of the headstock, namely, the transition into the neck.  Let us begin.

The end result- you can just make out the V-shaped
transition.  I'll take better pictures at a later date, to further
illustrate the effect.
I started the day by wrapping up the beveling on the edges of the headstock laminate; just some finishing touches.  By the time I was done that, I had decided which type of transition I was to do on the back of the headstock, where the neck begins.  My options were a curved "V" type of transition, a standard curve, or a bell or uvula-shaped-type of curve.  It was decided that the V-shape was what I would go with, and luckily, Ned said that this was probably the easiest of the three to achieve.  As the neck was still very much a rectangular block of wood, I had to take plenty of it off.

To remove the wood, I began with a coarse round file, to get the feel of the actions I would be taking.  Upon becoming comfortable with the strokes and their shapes, I moved on to a bigger tool, with more bite- a rasp.  I used the rasp to reduce the edges of the neck to curves on both sides.  Before I started, I used a round object to make the outline of the V-shape.  Each segment of the V was essentially an arc of a greater circle, with the peaks pointing towards each-other.  I used the rasp for some time, and towards the end of the process, I transitioned into using files, which would take away less wood with each stroke.  The desired thickness of the neck at the top was to be about 17mm, before accounting for the fingerboard.  I used calipers to measure the section that I had reduced, putting the caliper tips on each side of the ebony center strip, as its edges were the highest and lowest points.  I did some finishing touches to keep the height consistent, and finished the rounding of the back of the neck.

After a good while of work on the top of the neck, it was time to move to the base of it- to the heel block.  There being a large amount of excess wood at this end, Ned did a quick chop for me on the band saw, which would make things much easier.  This yielded a block of wood for me to take home, which I had ideas of making little gifts out of (it contained mahogany, and the ebony centre strip, as well).  I took the neck in my hands and felt the weight that had been taken from it- it was great!  One step closer to completion.  I clamped the neck down to the bench, with a couple clamps, placing a block of wood (softer than mahogany) below it, against the surface to which the fingerboard was to be adhered.  The reason for this was to keep that surface unmarred, and free of blemishes of any sort, to ensure an optimum bonding surface.

I began by using a little template, whose shape resembled a boat, from above, to mark the outline of the heel block's flat surface, which would be attached to the back of the guitar.  After using central lines to align and mark it, I got to work.  In the previous session, I used another template to mark the side profile lines of the heel block, so I now had an idea of the shape of the heel block, from the top and sides.  I began removing wood with a chisel- I found this process much to my liking.  I chiseled away at both sides for what was probably one half-hour, or thereabouts.  Once I had the shape pretty close to what it would be, I began using a rasp.  For time's sake, I will summarize the process:  I used the rasp and various files until the heel block was at the desired shape, which took much time, to make everything fluid and aesthetically appealing.

The heel block was the last step of the day.  At this point, both the top and the bottom of the headstock were done.  The curves at the top and bottom of the
The end of the chiseling process
neck were defined- all that remains on the neck is joining the two curve transitions, which will complete the neck.  Any finishing touches on the heel block and/or headstock can be done before the finish is applied to the guitar.  Ned told me that the next piece of the puzzle may very well be bending the sides, which is something I have yet to put my hand to.  Exciting!  The day draws nearer where the pieces will begin to be joined... ahhhh, yes.

That about does it for this entry- I will throw in a few extra pictures below.  Until next time!


The complete heel block.  Oh!  If I'm not mistaken, there is
still a bit of wood to be taken off of the back of it... but I may
very well be mistaken- I can't quite remember.


Ah, yes- I almost forgot.  I took a picture of the back of a guitar that Ned just started on, today.  The guitar will be a flamenco, which he is building for one of his clients.  The top is Lutz spruce, and the back is a variety of Maple (I'm not sure which).  But the reason I'm mentioning this will be evident, once you see... the grain patterns are beautiful!

There will be a centre strip, containing strips of ebony
and maple.


Monday 13 May 2013

Day 11

Running behind on the blog!  Day eleven took place on Friday, May 10.  I didn't take as many pictures, this time, so not every step is individually depicted, but you'll definitely see the sum of the steps in the pictures that are shown

Most of the day's work was spent working on the headstock.  When I started that morning, the headstock was still in need of a lot of work.  The routing job had been done, which gave it its shape, but the router can only do so much- all of the finishing touches would be done with various types of files. 


To start, I took a template which was the shape of the headstock, placed it upon the top, and used a well-sharpened pencil to mark  portions of the headstock that needed to be removed via filing.  I started with a very small square file, and switched back and forth between that, and a small triangular one.  The points on these files assisted in achieving the troughs that are seen in the top profile of the headstock.  I defined each trough, and made sure everywhere in between was smooth, and fluid.  I used a half-round file to centre the peak of the headstock, which was where the ebony accent strip that runs the length of the neck/headstock ends. 

The second major step of the day was creating string ramps.  String ramps are found between the guitar's nut and the peg to which the strings are affixed.  There are a few different ways to do string ramps- the two I was choosing between was rounded fronts, or flat ones- I ended up choosing flat.  The look reminded me of church windows, or some other sort of window, having a flat base, and a rounded top.  This step took a good while.  The African wenge laminate is a very hard wood, so filing takes a lot of effort.  I filed the ramps, giving them a very apparent grade, ending just below the taper point, near the base of the guitar's headstock.  I did a bit of a hybrid ramp, having flat bottoms, that transitioned into a curve- Ned complimented my design.  Once the string ramps were complete, it allowed you to see the wenge, maple, and mahogany all at once, which was very nice.


String ramps

During our lunch break, Ned observed that it was a nice day, with little to no wind.  Him having an interest in remote-controlled helicopters, he decided it was a good opportunity to fly!  I believe this was the first time I had ever seen an RC helicopter in action, and I must admit, it was pretty neat.  I spent 5 or 10 minutes watching him fly.  


The next step I worked on was the beveling- all of the sharp edges were beveled, for aesthetic reasons, and also for functionality.  Having a beveled edge reduces the chance of chipping, and permits a better bond for the sealing of the guitar, reducing the chance of the finish being rubbed off, at a corner.  I did all of the beveling with files.  The profile at the top of the headstock, the entirety of the routed channels and string ramps, and the perimeter of the headstock were beveled.  I also softened the back edges of the headstock, and gave the back corner of the peak a slight round.  This process took some effort- like I said, the wenge is tough.


This was essentially the last step of the day.  There were a few little touch-ups I did, throughout the day, that were just for cosmetic purposes, but nothing too substantial.  Files were the tools of the day, and they did their jobs well!  With my help, of course ;)

Here are a few supplementary pictures:


Friday 3 May 2013

Day 10

Day ten. When I first consulted Ned in regards to this project, we had a sit-down meeting, and discussed facts, figures, procedures, materials, and a timeline.  The initial timeline he had estimated for me would be about twenty days.  Of course this is an estimate, as I am Ned's first apprentice/student to build a guitar, from beginning to end.  What I'm getting at, is this- assuming the estimate is about accurate, I am now halfway through my guitar building journey!  As I previously mentioned, all of the parts for my guitar have been started on, and a few of them even finished (the back and soundboard).  My sides are also dressed and ready for bending, and my bridge is now about 75% done.  The bulk of what remains is the neck, headstock, heel block, fingerboard, and frets- and of course the amalgamation of the guitar's counterparts.

Also to be mentioned- some of the pictures I took, that will be featured in today's entry, were taken with my new camera, although I am still very much a novice, when it comes to photography.  I am merely taking quick shots to capture what I'm working on.  I am also new to this camera, and haven't played much with the settings, at all.  I have much to learn, and hope to do so, in the near future. 


Let's get down to business.  On Wednesday, I entered Ned's place, a few minutes early.  He put on some coffee, and we chatted for a bit.  We discussed life, careers, interests, and and all that jazz.  I'm at an age where a lot of these things are very real decisions I must now make- namely, a career path.  I could go off on a tangent on this whole subject, but I'll stick to the purpose of the blog, that being guitar-building.  We headed downstairs with our coffee, and began the day's work.

Our conversation continued, in the shop, about all of these things.  Careers, hobbies, and life decisions.  It's good to have insight from someone who has made these choices, and has both received and given advice of his own.  On the workbench, patiently awaiting my touch, laid my guitar's neck.  The clamps and wax paper had been removed, from the last procedure of last week, which was the application of the headstock's laminate (African wenge wood, with a 0.6mm maple accent, beneath).  There was plenty of extra wood on the sides of the laminate, and the neck had plenty of extra meat, as well.  To get rid of these things, routing would have to be done.  But even before the routing was to be done, there was one step that had to be completed, first: sawing.

There being an excess of the laminate, on all sides of the headstock, I now had to saw a section of it off, on the side that was to be flush with the nut, leading to the fingerboard.  A piece of green painter's tape was placed underneath the protruding laminate, upon the neck, where the fingerboard and nut were to go.  The purpose of this tape was to mark where the flat of the neck stopped, and where the downward slope of the headstock began.  This gave me a visual of where to draw my line, to saw upon.  I marked a notch on each side, where the tape stopped, and then connected the two.  The edge of the cut I was to make would go against the nut, securing it in place against the ebony fingerboard.  A jig that Ned made was clamped into place- it was essentially a strip of wood, possessing a width equal to the length of the neck, in its present state.  At the top of the jig, there was another piece of wood, perpendicular to the neck- this was a surface that would ensure that the saw blade remained perpendicular during the cutting process.  I flushed the edge of the cutting saw's guide with the line that I had made, allowing room for the width of the blade.  A square was used to verify that the cut would be completely straight- it ended up that another line was needed, as the initial one wasn't quite perfect.  All necessary things were done, and the piece was clamped into its final place- I was then presented with the Japanese-style pull-cut saw.

 
The cut was to be less than 3mm deep, as the Wenge was about 2.0mm, and the maple was only 0.6mm.  The blade was to remain flat against the wood, and not at an angle, as it was when I made the scarf joint for the neck/headstock- this was necessary, because if the blade were at an angle, the front end of the blade would cut deeper than the back, and would thus cut into the neck, before the excess laminate was completely severed.  The neck must remain unscathed!  I began my cut, and used a block on the right side of the blade, to push the saw into the perpendicular plane which lied against its left side.  I did a lots of cutting and checking, so I knew what depth I was at.  I finished my cut, removed the excess laminate, and used a chisel to clean up the edge.  The painter's tape was then removed. 


The jig, which sits flush
against the edge of the
laminate on the headstock.


The next step was to apply another jig- this one would sit flush with the cut I had just made, and would be centered and screwed upon the neck.  The placement was done, and two screws were set- one at the top, just left of centre, and one at the bottom, just right of centre.  This kept the jig from moving at all.  Its purpose was to create a track for the router, so I could remove the sides of the neck, reducing it to its final width.  The bit that would be used was a pattern bit, which has a small bearing at the top of it, that sits flush against the pattern piece you are using.  This ensures that your cut only goes as far as you want it to, and lets you follow the
The router's pattern bit.
"track" of the pattern piece, as a guide.  There was probably close to an inch on each side to remove, before I was even near the edge of the pattern piece, so I had plenty of routing to do.  Ned set up a few pieces of wood around my workspace, which served as a barrier to stop as much sawdust and shavings from the routing process, confining as much to the bench, as possible (routing gets very dusty).  I hadn't really done much routing, in the past, save for what I did on my bridge, so this was a new technique for me to develop.  We went over safety and precautions before I began, and then I got to work.  In short, I removed a bunch of mahogany from both sides of the neck, then made one slow and fluid pass along the length of the pattern/jig, to achieve an edge that was nice and smooth.


The routing process on the sides of the neck is now complete,
and the jig has been removed.  As you can see, there is
mahogany dust... everywhere.

Upon completion, the jig was removed, and another one was set in place- this time, on the headstock. 
As the smooth sides indicate, the routing has been done
on the sides of the headstock, but the top has yet
to be scathed.  The jig can be seen, on top.  Also, the
contrast of the maple between the wenge and
mahogany is now visible.  Very nice!
I did the same process, here, routing the sides and top, removing all excess woods.  The top profile of the headstock was done only to a rough shape, as all finishing work was to be done by me, with various types of files.  Any other discrepancies in the routing work would also be touched up by hand, with a file.  One thing that is noteworthy in the process of routing is the direction in which you work- grain must be taken into consideration, from different angles.  Each section of wood must be approached properly, and you mustn't route too deep at once, lest you chip and splinter your workpiece- especially when nearing the final stages. 

Once I finished the routing, Ned used another jig to drill holes in my headstock, in which the tuning pegs would be inserted.  This step was done by him, as the jig he was using was new, and very touchy, so his judgement dictated that it was best for this procedure to be done by him- this was fine by me, as I know how to drill, thus, wouldn't really have too much to learn by performing this process, myself.

It was nice to take a look at the headstock and neck, which were now coming together nicely.  Their rough shapes were now there- the metamorphosis was a pleasant one.  One more bit of routing was to be done, that day, but the next jig/pattern needed a slight surface repair before we could begin.  It involved glue and filing, so it would take an hour or more before it was ready to use.  While Ned worked on that, I did some more work on my bridge.


I had the wings of my bridge roughed out, and one of the two saddle supports started.  I still had to do the tapering on the edges of the wings, and plane/chisel the other saddle support to shape- not to mention, the tie block, which was still untouched.  I rounded off one edge of the second bridge support, and proceeded to take even more off of the one that I had already started, as advised by Ned.  I didn't take any pictures of my bridge, this week, so you'll have to wait until next time, to see where I'm at.  I used a file to begin the tapering of the wings, and used a bit of sandpaper, as well.  I used a square file to do some finishing touches on the right angle where the saddle supports and tie block protruded from the bridge, and also a milling file, to reduce the height of the vertical edge-profile of the wings, even more.  They are probably only 1mm high, if that, now.  I used the same milling file to do some finishing on the camber of the wings, as well.

Ned and I discussed what would be done for the tie block- the original plan was to use a strip of rosette (matching the one that surrounds my soundhole) to top it off.  I have seen a few of Ned's guitars that use ebony with bone on either side, and I much prefer this look to that of a strip of rosette.  The contrast of the dark ebony against the white bone appeals much more to me than the intricate wood mosaic of a rosette.  The way in which we finish the tie block is a matter of preference, for aesthetic reasons, so it is my preference that matters.  Ned mentioned that it would take probably a half a day to use ebony and bone, rather than the rosette strip, but I essentially made it clear that I would compensate in whatever way necessary, if necessary, to achieve the look that I wanted on my guitar.  We'll cross that bridge when we come to it (Yeah, yeah- pun intended).

After working on my bridge for some time, the pattern/jig piece that Ned was working on was ready to be put to use.  It was a neat looking jig- it consisted of two main parts, one of which is a top/cover that is bolted into place by way of wingnuts.  This piece is used as a

guide for the router, to remove the two channels of wood through which the gear-shaft pegs, to which the strings will be affixed, may be seen.  This process was a bit different from the previous routing ones, due to the narrow and enclosed area which the routing bit would be maneuvered through.  I did a succession of semi-circular motions, to gradually shave away at the wood, until the final shape was made.  I did this process twice- once for each side.  Upon getting the bulk of the wood off, a couple fluid passes around the perimeter of each channel was done, to regulate the consistency of the cut.  Again, final touch-ups would be done with a file.

A nice preview of the top of the headstock, housed in a jig.  Its ebony peak, and
the rest of its profile is still very rough, and will be finished by hand, with a file.
That maple accent!  Mighty sharp.

I believe this was the last step of the day.  My headstock was now really coming along.  It was beautiful to look at it, from all angles.  The routing I did allowed me to see the true effect of the maple accent between the mahogany and wenge, which was quite sharp.  I was very pleased with the overall aesthetic of it, so far, and it will only get better!


We cleaned up the shop, I put my workpiece away, and that was that.  


A picture is worth a thousand words.